Part of being a developer is having your own virtual private server (VPS). Personally, I’m a big fan of Digital Ocean. Amazon however offers a year of free service, so to keep our beer budget intact, in this tutorial, I’ll walk you step by step on setting up an EC2 Instance on AWS.
SET UP SERVER
Create AWS Account
Go into AWS and set up an account. It’s free with the basic account but credit card and phone verification is still required. Takes a few minutes. Then, dive into EC2.

Create an Instance
Go to “My Account” > “AWS Management Console”. Then “Launch Instance”:

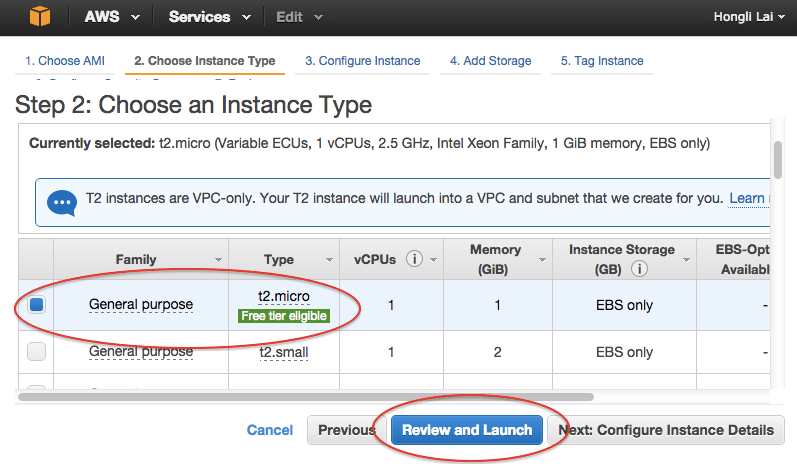
Choose 64-bit Ubuntu Server.

Launch Instance with the free tier.
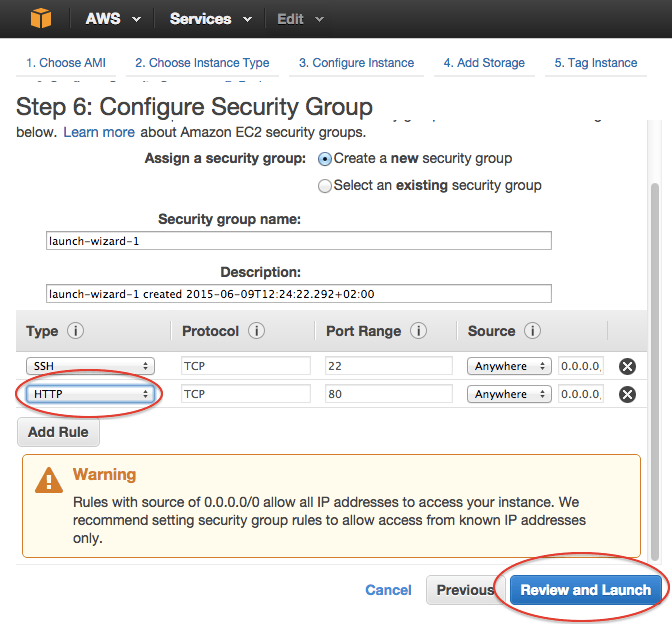
Open up HTTP connection on port 80 for your server.
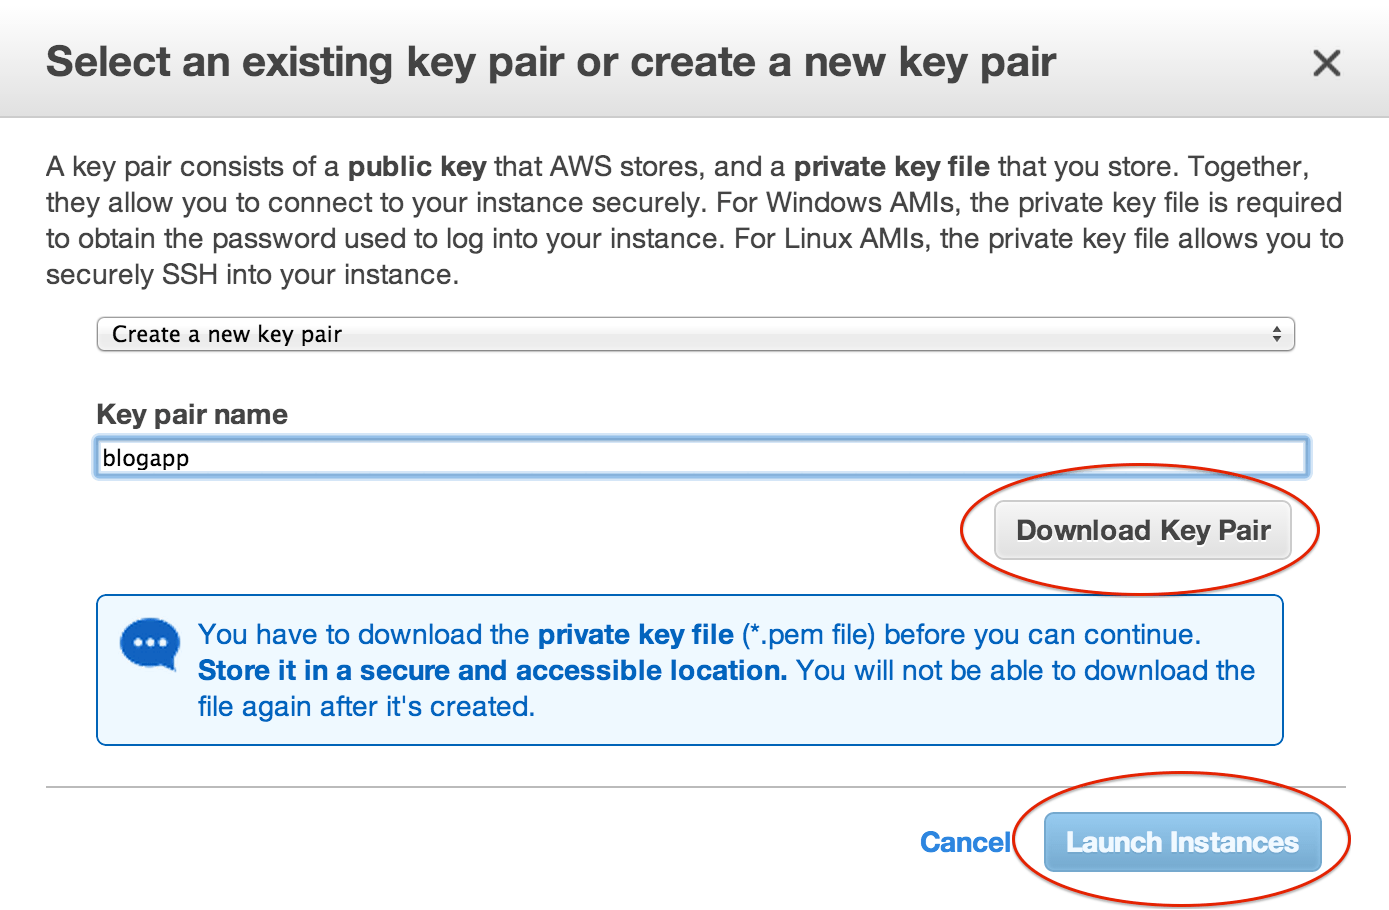
A prompt to add key pair will show up. Create and download a new one. (don’t lose it)
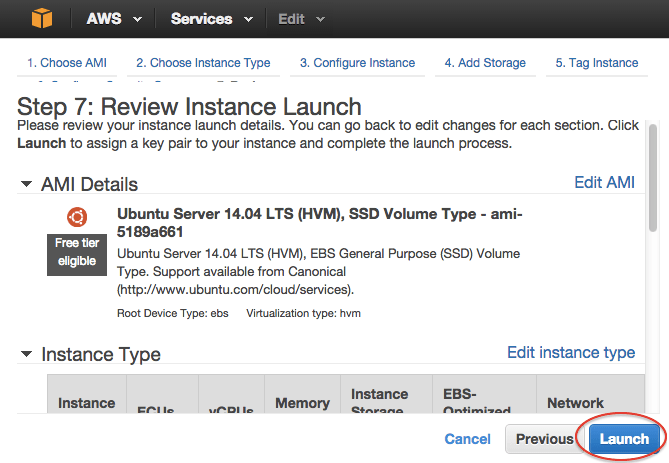
Launch again!
Connecting through SSH
Let’s take a look at our instances now.
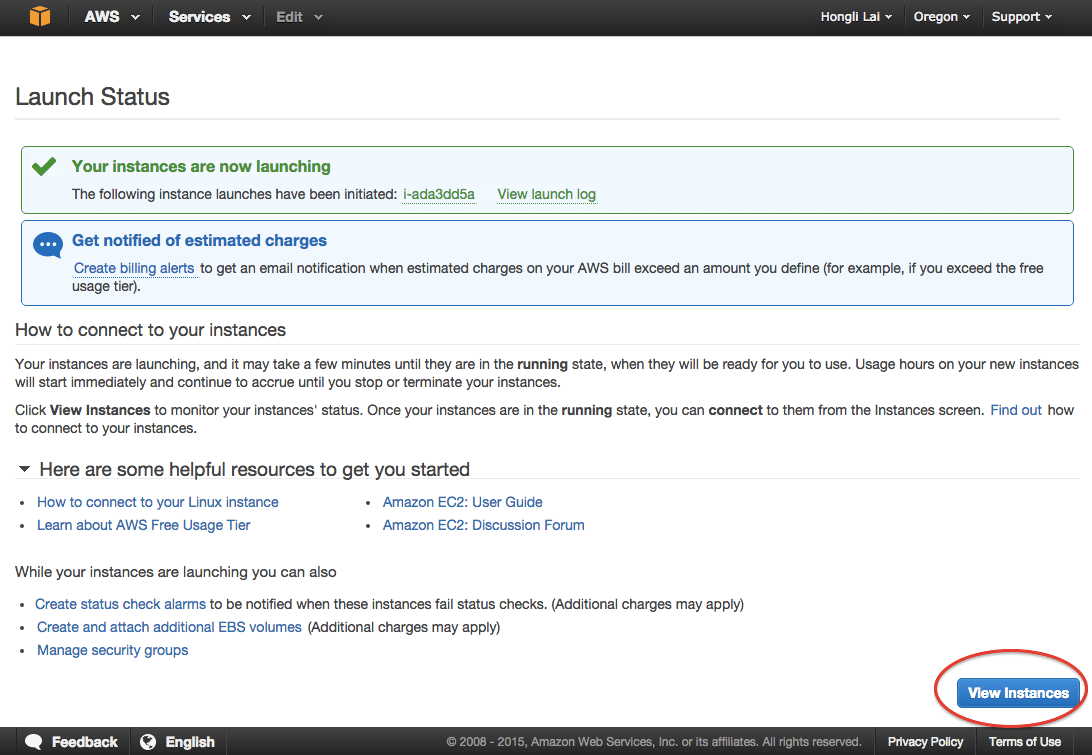
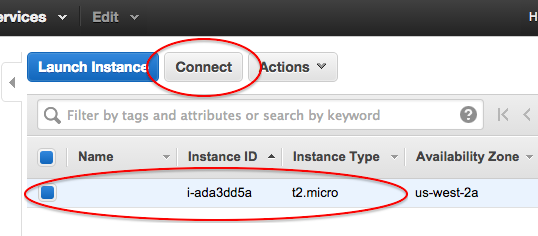
Find the public IP for the instance that we created. We’ll use it in a bit.
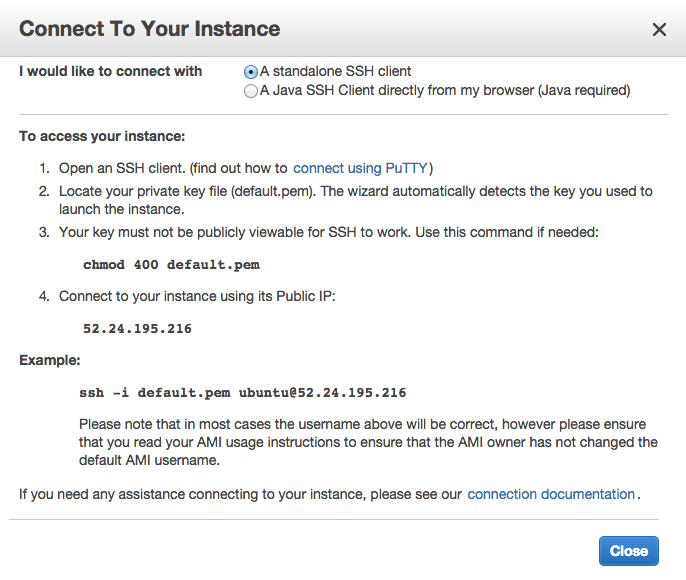
Copy the SSH key (that was downloaded and not lost) and paste it into the ~/.ssh file. Then change ownership to secure it: chmod 600 /.ssh [ssh_key].pem
Now, connect to the instance: ssh -i ~/.ssh/[ssh_key].pem ubuntu@[ip address]
BUY DOMAIN
Go to a domain site and purchase a name. They range around $10. Here are some places to start:
Then, navigate to editing the DNS records for that domain. Add a basic ~type A~ host with the IP of the AWS server previously set up and the name of the domain.
Extra: add a ~type CNAME~ host with the same IP address and the name of www to catch and redirect anyone trying to go to www.yourdomain
POWER UP UBUNTU SERVER
Replace Ubuntu User (not necessary)
- Connect back to the AWS Server:
ssh -i ~/.ssh/[ssh_key].pem ubuntu@[ip address] - Add a new user through the following commands:
sudo adduser [your name]
sudo gpasswd -a [your name]
- Remove root user
vi /etc/ssh/sshd_config
- find PermitRootLogin yes, and change to no
- service ssh restart
- su [your name]
Install Tools
Use sudo apt-get install to install most technologies into the server. To get started, type sudo apt-get update.
Nginx:
apt-get install nginx
Out of the box, nginx sets up a hello world on port 80. You should be able to navigate to your server from your browser (through the ip address or newly purchased domain) and see a welcome to nginx.
Adding a Project
First, lets add the project to our server. For this demo, choose a static site. The easiest way is to use git
sudo apt-get install git
then clone your project inside /etc/nginx/sites-available/
The main configuration of ngninx lives in sudo vi /etc/nginx/sites-enabled/default. There, you will see the server configurations for port, paths and project directory.
To add your own project, change the root default path to the path of our added project:
/etc/nginx/sites-available/{your-project-name}
Always remember to restart the server after any change.
sudo service nginx restart
NEXT STEPS
From here, time to beef up your server. Look into the Digital Ocean tutorials for setting up any language environment and Reverse Proxy Servers.

